はじめに
Terraform を使って、ALB+EC2の構成を作ってみる。
環境
Windows 10 Professional

WSL2 (Ubuntu 22.04 LTS)
Terraform v1.5.5準備
Terraformを使用してシンプルなAWS EC2の構成を構築する の内容を導入済み
※AWSのIAMの権限に、ElasticLoadBalancingFullAccess をつけた。
構築するアーキテクチャ

※複雑になると分かりにくくなってきたかも…
Terreaformの構成
GitHub に今回作成したTerraformの構成をあげておいた。
https://github.com/katsuobushiFPGA/aws-alb-ec2-with-terra-form.git
もしよければ一緒に構築してもらえればと思う。
各種リソースの定義
| ファイル名 | 役割 |
|---|---|
| main.tf | プロパイダーとリージョンの定義をする |
| aws_vpc.tf | VPCの定義/サブネットの定義/ルートテーブル/IGW/NGWの定義 |
| aws_ec2.tf | EC2の定義 |
| aws_sg.tf | セキュリティグループの定義 |
| aws_eip.tf | EIPの定義 |
| aws_alb.tf | ALBの定義 |
main.tf
terraform {
  required_providers {
    aws = {
      source  = "hashicorp/aws"
      version = "~> 5.0"
    }
  }
}

# Configure the AWS Provider
provider "aws" {
  region                   = "ap-northeast-1"
  shared_credentials_files = ["/path/to/dir/.aws/credentials"]
  profile                  = "terraform"
}ここでは、AWSをプロパイダーとする設定とリージョンや認証情報を定義する。
aws_vpc.tf
resource "aws_vpc" "vpc" {
  cidr_block = "10.0.0.0/16"
}

resource "aws_subnet" "public_subnet" {
  vpc_id                  = aws_vpc.vpc.id
  cidr_block              = "10.0.1.0/24"
  availability_zone       = "ap-northeast-1a"
  map_public_ip_on_launch = true
}

resource "aws_subnet" "public_dummy_subnet" {
  vpc_id                  = aws_vpc.vpc.id
  cidr_block              = "10.0.3.0/24"
  availability_zone       = "ap-northeast-1c"
  map_public_ip_on_launch = true
}

resource "aws_subnet" "private_subnet" {
  vpc_id                  = aws_vpc.vpc.id
  cidr_block              = "10.0.2.0/24"
  availability_zone       = "ap-northeast-1a"
  map_public_ip_on_launch = false
}

resource "aws_internet_gateway" "igw" {
  vpc_id = aws_vpc.vpc.id
}

resource "aws_nat_gateway" "ngw" {
  allocation_id = aws_eip.nat.id
  subnet_id     = aws_subnet.public_subnet.id

  tags = {
    Name = "NAT"
  }

  depends_on = [aws_internet_gateway.igw]
}

resource "aws_route_table" "public_route_table" {
  vpc_id = aws_vpc.vpc.id
  route {
    cidr_block = "0.0.0.0/0"
    gateway_id = aws_internet_gateway.igw.id
  }
}

resource "aws_route_table" "private_route_table" {
  vpc_id = aws_vpc.vpc.id
  route {
    cidr_block = "0.0.0.0/0"
    gateway_id = aws_nat_gateway.ngw.id
  }
}

resource "aws_route_table_association" "public_route_assoc" {
  subnet_id      = aws_subnet.public_subnet.id
  route_table_id = aws_route_table.public_route_table.id
}

resource "aws_route_table_association" "public_dummy_route_assoc" {
  subnet_id      = aws_subnet.public_dummy_subnet.id
  route_table_id = aws_route_table.public_route_table.id
}

resource "aws_route_table_association" "private_route_assoc" {
  subnet_id      = aws_subnet.private_subnet.id
  route_table_id = aws_route_table.private_route_table.id
}ここでは、パブリックサブネットとプライベートサブネットを定義し、ルートテーブルを紐付ける。
また、IGW/NGWを定義する。
aws_ec2.tf
resource "aws_instance" "public_app_server" {
  ami           = "ami-0e0166ef4456f252a" #AmazonLinux2023 (arm)
  instance_type = "t4g.micro"
  subnet_id     = aws_subnet.public_subnet.id
  key_name      = aws_key_pair.ec2_key.key_name
  user_data     = file("./files/user_data.sh")

  vpc_security_group_ids = [
    aws_security_group.web.id,
    aws_security_group.ssh.id
  ]

  tags = {
    Name = "SamplePublicEC2Instance"
  }
}

resource "aws_instance" "private_app_server" {
  ami           = "ami-0e0166ef4456f252a" #AmazonLinux2023 (arm)
  instance_type = "t4g.micro"
  subnet_id     = aws_subnet.private_subnet.id
  key_name      = aws_key_pair.ec2_key.key_name
  user_data     = file("./files/user_data.sh")

  vpc_security_group_ids = [
    aws_security_group.alb.id,
    aws_security_group.for_private_ssh.id
  ]

  tags = {
    Name = "SamplePrivateEC2Instance"
  }
}

# キーペア
resource "aws_key_pair" "ec2_key" {
  key_name   = "ec2-ssh-key"
  public_key = "ssh-ed25519 XXXXXXXXXXXXXX" # 事前に作成した公開鍵を貼り付ける
}ここではEC2インスタンスを2台定義し、パブリックサブネットとプライベートサブネットにそれぞれ配置する。
また、SGとキーペアをインスタンスに設定しておく。
aws_sg.tf
# セキュリティグループ
resource "aws_security_group" "web" {
  name   = "web"
  vpc_id = aws_vpc.vpc.id

  ingress {
    description = "allow http"
    from_port   = "80"
    to_port     = "80"
    protocol    = "tcp"
    cidr_blocks = ["0.0.0.0/0"] # IP制限
  }

  egress {
    from_port   = "0"
    to_port     = "0"
    protocol    = "-1"
    cidr_blocks = ["0.0.0.0/0"]
  }
}

# セキュリティグループ
resource "aws_security_group" "alb" {
  name   = "alb"
  vpc_id = aws_vpc.vpc.id

  ingress {
    description = "allow http"
    from_port   = "80"
    to_port     = "80"
    protocol    = "tcp"
    cidr_blocks = ["0.0.0.0/0"]
  }

  egress {
    from_port   = "0"
    to_port     = "0"
    protocol    = "-1"
    cidr_blocks = ["0.0.0.0/0"]
  }
}

resource "aws_security_group" "ssh" {
  name   = "ssh"
  vpc_id = aws_vpc.vpc.id

  ingress {
    description = "allow ssh"
    from_port   = "22"
    to_port     = "22"
    protocol    = "tcp"
    cidr_blocks = ["XX.XX.XX.XX/32"] # IP制限
  }

  egress {
    from_port   = "0"
    to_port     = "0"
    protocol    = "-1"
    cidr_blocks = ["0.0.0.0/0"]
  }
}

resource "aws_security_group" "for_private_ssh" {
  name   = "for_private_ssh"
  vpc_id = aws_vpc.vpc.id

  ingress {
    description = "allow ssh"
    from_port   = "22"
    to_port     = "22"
    protocol    = "tcp"
    cidr_blocks = [aws_subnet.public_subnet.cidr_block]
  }

  egress {
    from_port   = "0"
    to_port     = "0"
    protocol    = "-1"
    cidr_blocks = ["0.0.0.0/0"]
  }
}ここでは、セキュリティグループの定義をする。SSHは自身のIPのみに制限しておいたほうが良い。
aws_eip.tf
resource "aws_eip" "nat" {
  depends_on = [aws_internet_gateway.igw]
}NATゲートウェイで使用するEIPを定義する。
aws_alb.tf
resource "aws_lb" "alb" {
  name               = "alb"
  internal           = false
  load_balancer_type = "application"

  security_groups = [aws_security_group.web.id]
  subnets         = [aws_subnet.public_subnet.id, aws_subnet.public_dummy_subnet.id]
}

resource "aws_lb_target_group" "alb_target" {
  name     = "target"
  port     = 80
  protocol = "HTTP"
  vpc_id   = aws_vpc.vpc.id
  health_check {
    interval            = 30
    path                = "/index.html"
    port                = 80
    protocol            = "HTTP"
    timeout             = 5
    unhealthy_threshold = 2
    matcher             = 200
  }
}

resource "aws_lb_target_group_attachment" "private_ec2" {
  target_group_arn = aws_lb_target_group.alb_target.arn
  target_id        = aws_instance.private_app_server.id
  port             = 80
}

resource "aws_lb_listener" "lb_listener" {
  load_balancer_arn = aws_lb.alb.arn
  port              = "80"
  protocol          = "HTTP"

  default_action {
    type             = "forward"
    target_group_arn = aws_lb_target_group.alb_target.arn
  }
}ALBの定義をする。
プライベートサブネットにあるEC2インスタンスにつなげる。
terraformでデプロイまで
terraform validate
terraform validateSuccess! The configuration is valid.terraform fmt
terraform fmt整形する。
terraform plan
terraform planTerraform used the selected providers to generate the following execution plan. Resource actions are indicated with the following symbols:
+ create
Terraform will perform the following actions:
...変更点を確認する。
terraform apply
デプロイの実施。
terraform applyサブネットおよびアベイラビリティゾーンが2つ以上必要になるエラー
ValidationError: At least two subnets in two different Availability Zones must be specifiedもしくは
Error: creating ELBv2 application Load Balancer (alb): InvalidConfigurationRequest: A load balancer cannot be attached to multiple subnets in the same Availability Zone
│ status code: 400, request id: cb26286a-afc8-46d6-b00a-90586b4295ebのエラーがでる。 これは、ALBではサブネットを2つ以上かつ異なるアベイラビリティゾーンを指定しないとだめらしい。
https://qiita.com/Kobayashi2019/items/0da45f21d0c27ec84559 を参考にし、ダミーサブネットを作成した。
→アベイラビリティゾーンが同じだと2個目のエラーが出るので、異なるアベイラビリティゾーンを指定した。
SamplePublicEC2Instanceの確認
SSH接続
$ ssh -i id_ed25519_terraform [email protected]

Are you sure you want to continue connecting (yes/no/[fingerprint])? yes
Warning: Permanently added '3.112.12.53' (ED25519) to the list of known hosts.
   ,     #_
   ~\_  ####_        Amazon Linux 2023
  ~~  \_#####\
  ~~     \###|
  ~~       \#/ ___   https://aws.amazon.com/linux/amazon-linux-2023
   ~~       V~' '->
    ~~~         /
      ~~._.   _/
         _/ _/
       _/m/'
[ec2-user@ip-10-0-1-158 ~]$ http接続
SamplePrivateEC2Instanceの確認
SSH接続
パブリックサブネットのインスタンスからはアクセスできるので…。
[ec2-user@ip-10-0-1-158 .ssh]$ ssh -i private.key [email protected]
   ,     #_
   ~\_  ####_        Amazon Linux 2023
  ~~  \_#####\
  ~~     \###|
  ~~       \#/ ___   https://aws.amazon.com/linux/amazon-linux-2023
   ~~       V~' '->
    ~~~         /
      ~~._.   _/
         _/ _/
       _/m/'
[ec2-user@ip-10-0-2-55 ~]$ NATゲートウェイ が機能しているかの確認
[ec2-user@ip-10-0-2-55 ~]$ sudo dnf update
Last metadata expiration check: 0:07:26 ago on Mon Aug 14 07:26:38 2023.
Dependencies resolved.
Nothing to do.
Complete!
[ec2-user@ip-10-0-2-55 ~]$ curl https://google.com
<HTML><HEAD><meta http-equiv="content-type" content="text/html;charset=utf-8">
<TITLE>301 Moved</TITLE></HEAD><BODY>
<H1>301 Moved</H1>
The document has moved
<A HREF="https://www.google.com/">here</A>.
</BODY></HTML>
[ec2-user@ip-10-0-2-55 ~]$ curl httpbin.org/ip
{
  "origin": "35.75.200.245"
}
[ec2-user@ip-10-0-2-55 ~]$ 
IPアドレスがNATゲートウェイのものと同じであることを確認できた。
http接続
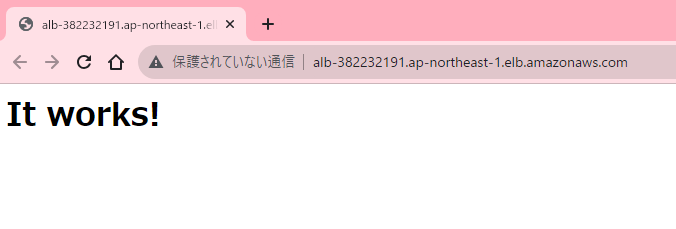
ALB経由からのアクセスを試す。
terraform destroy
terraform destroy※後始末
参考
- AWS Provider
https://registry.terraform.io/providers/hashicorp/aws/latest/docs - Terraform で ECS 環境を構築する① 〜ネットワーク編〜
https://blog.linkode.co.jp/entry/2020/10/15/090000 - TerraformでAWS環境にApacheサーバを作成
https://qiita.com/ryu022304/items/9d820c5e4229e0966f89 - SSH キーの管理: SSH キーを作成する (ssh-keygen)
https://maku.blog/p/ftducs9/ - 踏み台サーバーを経由してプライベートサブネットにある EC2 に SSH で接続する
https://www.aws-room.com/entry/ec2-bastion - TerraformでAWSのセキュリティグループのルールを作成する方法の比較と注意点
https://dev.classmethod.jp/articles/terraform-security-group/ - パブリックなALBからプライベートなEC2にアクセスしてみた
https://zenn.dev/mn87/articles/b6a5e0e5b5ee4c - TerraformでALBを構築
https://cloud5.jp/terraform-alb/ - AWS&TerraformでWebサーバとALBを立ててみる
https://zenn.dev/guranytou/articles/7e6680fc93ce16 - ALBを1 AZ, 1 subnetで使う方法 with Terraform
https://qiita.com/Kobayashi2019/items/0da45f21d0c27ec84559 - TerraformでELBとEC2とRDSのよくありそうなWebパターンを作ってみる。
https://qiita.com/sicksixrock66/items/63c6b651e6ccc28b0285 - ALB | Terraformで構築するAWS
https://y-ohgi.com/introduction-terraform/handson/alb/ - TerraformでALBを構築する
https://dev.classmethod.jp/articles/terraform-alb/ - 【AWS】ALBに同じAZから複数のサブネットをアタッチできないのか?
https://qiita.com/shima-218/items/1597d1996aa1e7fde136
おわりに
作成してみたかった「プライベートサブネットにあるEC2インスタンスをALBのターゲットグループにしてHTTPアクセスをする」ということをできた。Terraform をもう少し使って構築を楽にしたい。
後は Ansible も近々記事にしていきたいと思う。

