はじめに
SSHで接続した際に、鍵ファイル+パスワードのみならず、何かしらの端末で認証できると更にセキュリティ強度があがるため、その環境がどのようなものかを確認するために実験してみる。
今回は、Dockerを使用するが、実験のためなので本番運用には適していない方法である。
そのため、2FAがどのような動作なのかを見てみたいというだけの興味がある方のものとなっている。
環境
Windows 10 Professional
Docker Desktop 4.16.3 (96739)
準備
下記リポジトリにて作成したため、興味ある方は是非使用してみてほしい。README.md に手順を記載した。
Repo: https://github.com/katsuobushiFPGA/ssh-2fa-sample-for-docker.git
構成
gateway コンテナが実際にSSHする踏み台のコンテナという位置づけである。
Dockerの構築
Dockerfileの作成
ここでは、Dockerfile の中身を見ていく。
User 追加部分
# AlmaLinuxを使用する。
FROM almalinux:8.4

# 下記でユーザを追加する。
# Add User
ARG USER_NAME
ARG USER_PASS
ARG GROUP_NAME=$USER_NAME
ARG UID=1000
ARG GID=1000
RUN groupadd -g $GID $GROUP_NAME && \
    useradd -m -s /bin/bash -u $UID -g $GID $USER_NAME
RUN echo "$USER_NAME:$USER_PASS" | chpasswd
SSH 追加部分
# SSHに必要なライブラリをインストールする。
# ssh
ARG SSH_PORT
RUN yum -y install openssh-clients openssh-server \
&& rm -rf /var/cache/yum/* \
&& yum clean all

# SSHの設定をする。
RUN sed -i 's/^AllowTcpForwarding no/AllowTcpForwarding yes/g' /etc/ssh/sshd_config
RUN sed -i 's/^GatewayPorts no/GatewayPorts yes/g' /etc/ssh/sshd_config
RUN sed -i 's/^X11Forwarding no/X11Forwarding yes/g' /etc/ssh/sshd_config
RUN sed -i "s/^#Port 22/Port $SSH_PORT/g" /etc/ssh/sshd_config
# 鍵ファイル生成
RUN ssh-keygen -A

# 作成したユーザのフォルダを作成する。
WORKDIR /home/$USER_NAME/
RUN mkdir -p /home/$USER_NAME/.ssh
RUN chown $USER_NAME:$GROUP_NAME -R /home/$USER_NAME

# 鍵ファイルを作成する。
USER $USER_NAME
RUN ssh-keygen -t ed25519 -f /home/$USER_NAME/.ssh/id_rsa -N ""
RUN cat /home/$USER_NAME/.ssh/id_rsa.pub >> /home/$USER_NAME/.ssh/authorized_keys
RUN chmod 700 /home/$USER_NAME/.ssh
RUN chmod 600 /home/$USER_NAME/.ssh/authorized_keys
GoogleAuthenticator 追加部分
# google-authenticatorをインストールする。
# GoogleAuthenticator
USER root
RUN yum -y install epel-release \
&& yum -y --enablerepo=epel install google-authenticator \
&& yum -y --enablerepo=epel install qrencode-libs \
&& rm -rf /var/cache/yum/* \
&& yum clean all

# 2faの設定
RUN echo 'auth required pam_google_authenticator.so nullok echo_verification_code' >> /etc/pam.d/sshd
RUN sed -i 's/^ChallengeResponseAuthentication no/ChallengeResponseAuthentication yes/g' /etc/ssh/sshd_config
RUN echo 'AuthenticationMethods publickey,keyboard-interactive' >> /etc/ssh/sshd_config
後処理部分
# ポートをEXPOSEする。
EXPOSE $SSH_PORT
# SSHを起動
CMD ["/usr/sbin/sshd", "-D"]
compose.ymlの作成
version: '3.8'
services:
  gateway:
    build:
      context: ./gateway
      args:
        USER_NAME: ${USER_NAME}
        USER_PASS: ${USER_PASS}
        SSH_PORT: ${SSH_PORT}
    ports:
      - ${SSH_PORT}:${SSH_PORT}
    restart: always
envの作成
SSHでログインするユーザおよびポートを設定する。
USERNAME=kbushi
USERPASS=kbushi
SSH_PORT=2222
動作確認
README.md の手順に従って動作を確認していく。
1. このリポジトリをcloneします。
git clone https://github.com/katsuobushiFPGA/ssh-2fa-sample-for-docker.git2. イメージをビルドし、立ち上げます。
docker compose up -d

[+] Running 1/0
 - Container ssh-authenticator-for-docker-gateway-1  Running
3. コンテナ内に.sshファイルが生成されているので、ホストファイルにコピーします。
$ docker ps
CONTAINER ID   IMAGE                                  COMMAND               CREATED         STATUS         PORTS                    NAMES
ab823ffd8f9c   ssh-authenticator-for-docker-gateway   "/usr/sbin/sshd -D"   7 seconds ago   Up 6 seconds   0.0.0.0:2222->2222/tcp   ssh-authenticator-for-docker-gateway-1
docker cp ab823ffd8f9c:/home/kbushi/.ssh volumes
4. SSHでのアクセスを試みます。
ssh -i volumes/.ssh/id_rsa kbushi@localhost -p 2222$ ssh -i volumes/.ssh/id_rsa kbushi@localhost -p 2222
The authenticity of host '[localhost]:2222 ([::1]:2222)' can't be established.
ECDSA key fingerprint is SHA256:iHMiIhPKBPyMdQUzVa19MiplVEZ19TqhWvdHPH4wJfs.
Are you sure you want to continue connecting (yes/no/[fingerprint])? yes
Warning: Permanently added '[localhost]:2222' (ECDSA) to the list of known hosts.
Password:
[kbushi@ab823ffd8f9c ~]$ アクセスできればOK
※下記のエラーが出たら、 ~/.ssh/known_hosts の内容を見て、今回アクセスするコンテナの部分を削除しておくこと。 (なんか鍵変わったよねみたいな注意)
@@@@@@@@@@@@@@@@@@@@@@@@@@@@@@@@@@@@@@@@@@@@@@@@@@@@@@@@@@@
@    WARNING: REMOTE HOST IDENTIFICATION HAS CHANGED!     @
@@@@@@@@@@@@@@@@@@@@@@@@@@@@@@@@@@@@@@@@@@@@@@@@@@@@@@@@@@@
5. コンテナ内に入り、google-authenticator をセットアップする。
docker-compose exec --user=kbushi gateway bash[kbushi@ab823ffd8f9c ~]$ google-authenticator
Do you want authentication tokens to be time-based (y/n) y
Warning: pasting the following URL into your browser exposes the OTP secret to Google:
https://www.google.com/chart?chs=200x200&chld=M|0&cht=qr&chl=otpauth://totp/kbushi@ab823ffd8f9c%3Fsecret%3D7VMAKQWO5SKDSIYZ2VP6MXCLGE%26issuer%3Dab823ffd8f9c
## でっかいQRコードが表示される。
## これ入力しても Authenticatorに登録できる
Your new secret key is: XXXXXXXXXXXXXXXXXXXXXXX
## Authenticatorのアプリに表示されている数字を入力する。
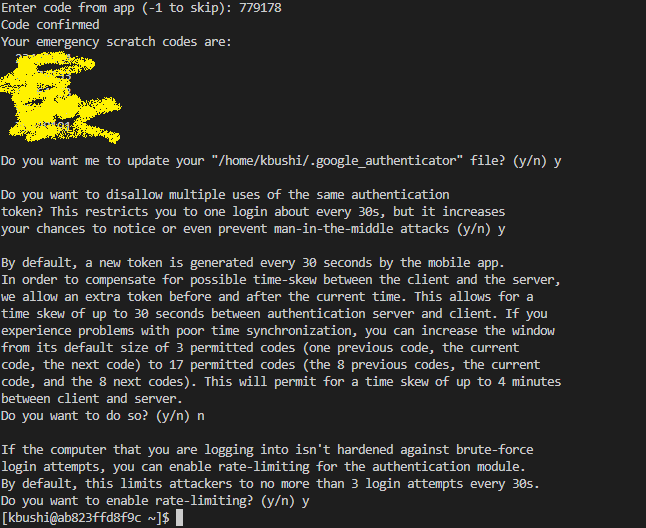
Enter code from app (-1 to skip): 779178
## ここにファイル作成/更新してよいかどうか
Do you want me to update your "/home/kbushi/.google_authenticator" file? (y/n) y
## 同じ認証トークンを複数回使用することを禁止しますか?
トークンの複数回使用を禁止しますか?この場合、約30秒に1回のログインに制限されますが、中間者攻撃に気づく可能性が高くなります。
中間者攻撃に気づく可能性が高くなり、防ぐこともできます。
Do you want to disallow multiple uses of the same authentication
token? This restricts you to one login about every 30s, but it increases
your chances to notice or even prevent man-in-the-middle attacks (y/n) y
## デフォルトでは、モバイルアプリによって30秒ごとに新しいトークンが生成されます。
クライアントとサーバー間の時間のずれを補正するため、現在時刻の前後に余分なトークンが生成されます。
現在時刻の前後に追加でトークンを生成することができます。これにより
これにより、認証サーバーとクライアントの間で最大30秒のタイムスキューが発生します。もし
時刻の同期がうまくいかない場合、このウィンドウを大きくすることができます。
をデフォルトの3コード(1つ前のコード、現在のコード、次のコード)から17コードに増やすことができます。
を17個(8個前のコード、現在のコード、次のコード)に増やすことができます。
を17個に増やすことができます。) これにより、クライアントとサーバー間で最大4分のタイムスキューが可能になります。
分までのタイムスキューを許容することになります。
そうしたいのですか?
By default, a new token is generated every 30 seconds by the mobile app.
In order to compensate for possible time-skew between the client and the server,
we allow an extra token before and after the current time. This allows for a
time skew of up to 30 seconds between authentication server and client. If you
experience problems with poor time synchronization, you can increase the window
from its default size of 3 permitted codes (one previous code, the current
code, the next code) to 17 permitted codes (the 8 previous codes, the current
code, and the 8 next codes). This will permit for a time skew of up to 4 minutes
between client and server.
Do you want to do so? (y/n) n
## ログインするコンピュータがブルートフォースに対して強化されていない場合、認証モジュールのレート制限を有効にすることができます。
ログインしようとするコンピュータがブルートフォースに対して強化されていない場合、認証モジュールの速度制限を有効にすることができます。
デフォルトでは、攻撃者は30秒に3回までしかログインを試行できないように制限されています。
レートリミッターを有効にしますか?
If the computer that you are logging into isn't hardened against brute-force
login attempts, you can enable rate-limiting for the authentication module.
By default, this limits attackers to no more than 3 login attempts every 30s.
Do you want to enable rate-limiting? (y/n) y
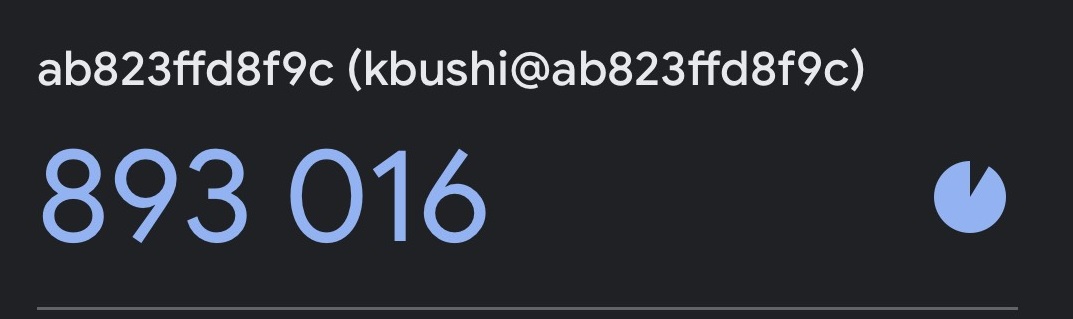
Appに登録したやつ
6. 再度SSHでログインをしてみる。 パスワードと認証コードが聞かれるようになる。
ssh -i volumes/.ssh/id_rsa kbushi@localhost -p 2222$ ssh -i volumes/.ssh/id_rsa kbushi@localhost -p 2222
Password:
Verification code: 781955
[kbushi@ab823ffd8f9c ~]$ ログインできればOK!
本番運用に関しては、ほぼ同じ手順で行けるはず。
(※このDockerを使用せずにDockerfileの手順に従うということ)
各ユーザに対して2FAをしたい場合は、各ユーザに google-authenticator コマンドの実行が必要である。
トラブルシューティング
Dockerfile , compose.yml を作成するに当たり、色々とトラブルがあった。
その際の解決方法と原因を記載しておく。
connection refused となり、SSH接続できない。
原因
compose.ymlのportsを下記のように記載していた。
ports
 - 22
この場合だと、ホスト22番に対して開放しているのかと思いきや実はできていなかったようだ。
解決方法
下記のように書くのが正解
ports
 - 22:22
原因
sshd_configに Port 22 の記載があったのだが、 #Port 22 となっていたため接続できなかった。
解決方法
これはコメントを外して対応することでできた。
compose.ymlでSSHの鍵を作成したが、SSHの鍵がなくなっていた。
原因
SSHの鍵を後でホストで使いたいと思っていたので、 volumes でそのフォルダをマウントしていた。
ただ、イメージが作成した後のコンテナ作成後に volumes でホストのフォルダをマウントするので、SSHのフォルダの中身は当然ホストと同じになっている。
そのため、なくなっているかのように見えていた。
解決方法
マウントせずに、コンテナ作成後に docker cp でコピーすることにした。
解決方法
SSHの鍵ファイルとかが作られていなかった
原因
Dockerfile 内で USER ~~~ と指定したユーザに変更する命令があるのだが、root ユーザで実行していたあるいは 作成したユーザで実行していたことがあり、上手く動作していなかった。
解決方法
例えば、root でないと パッケージインストール時にエラーになるので、Dockefileの中を見て、今現在どのユーザなのかを確認する
“docker endpoint for “default” not found"となる
原因
~/.docker/contexts 内の meta.json が何かしらの理由で壊れているからとのこと
解決方法
meta.json を削除することで解決。
(その後も頻発しているのでなんかおかしそう)
参考サイト様
- Almalinux8に2段階認証を用いたSSHを設定する! https://blog.maromaro.co.jp/archives/12132
- sed 置換の正規表現内で変数を使いたい
https://chaika.hatenablog.com/entry/2022/07/20/083000 - “docker endpoint for “default” not found"の対処法
https://qiita.com/noname_303/items/d025cf8ac816167fbe1f - Configure SSH to use two-factor authentication - Ubuntu
https://ubuntu.com/tutorials/configure-ssh-2fa#1-overview
おわりに
Dockerfile作成するのに結構時間がかかった。
やっぱりなまっているといけないなと思う