はじめに
これは2017/06/03 に作成した過去記事の移植です。
GitLabの環境構築
AmazonEC2のインスタンスを作成する。
1.AWSのアカウントを取得し、ログインをする。
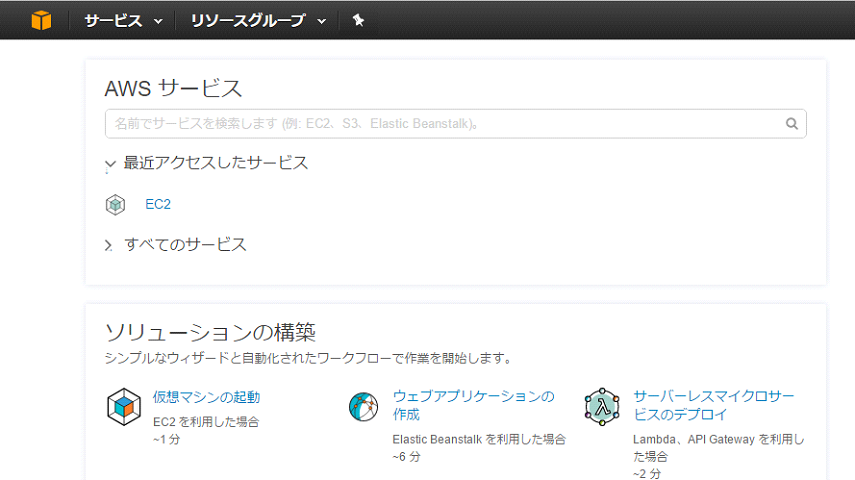
2.EC2を選択する。
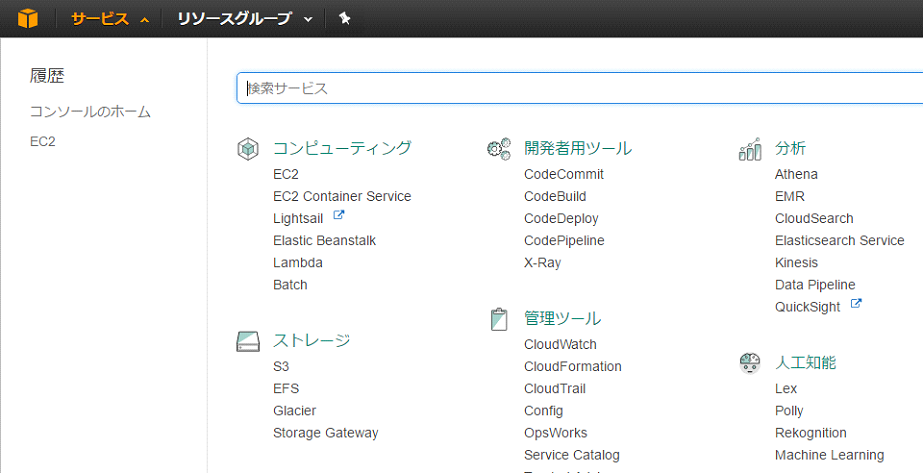
3.EC2を選択し、インスタンスを押す。
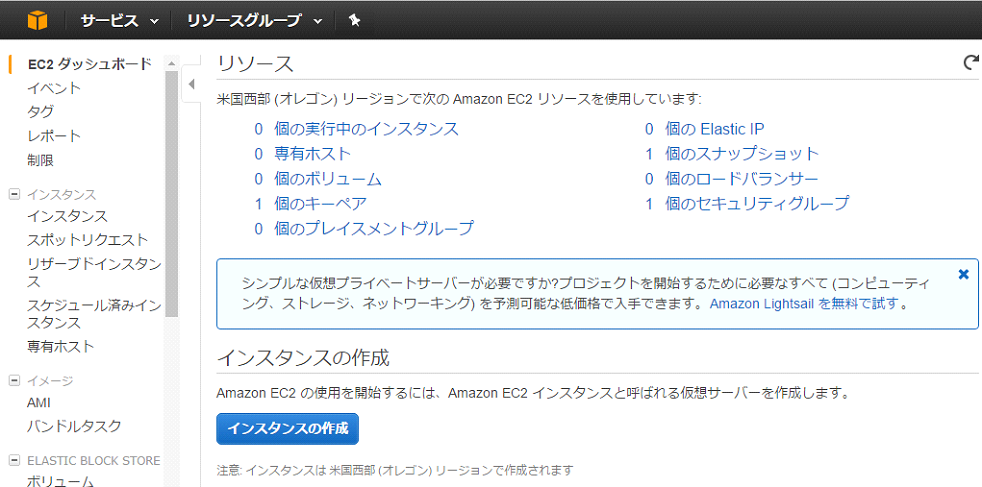
4. インスタンスの作成を押す。
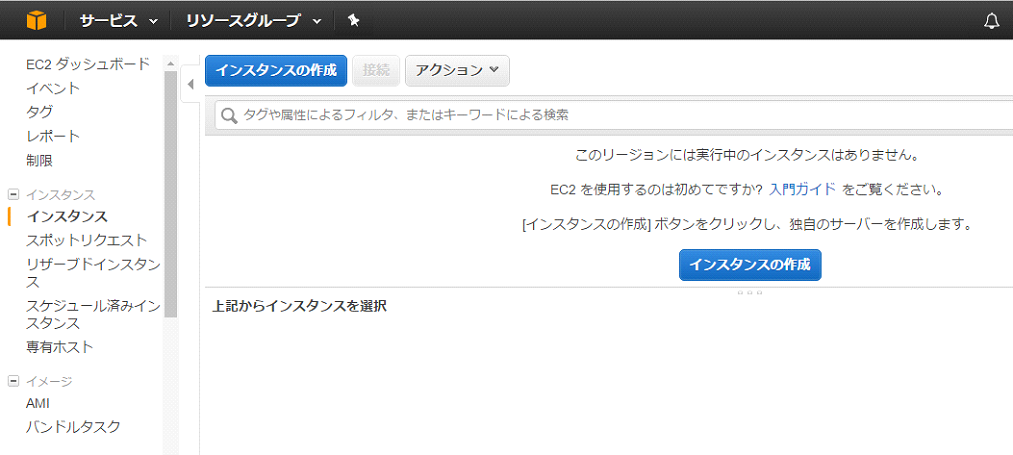
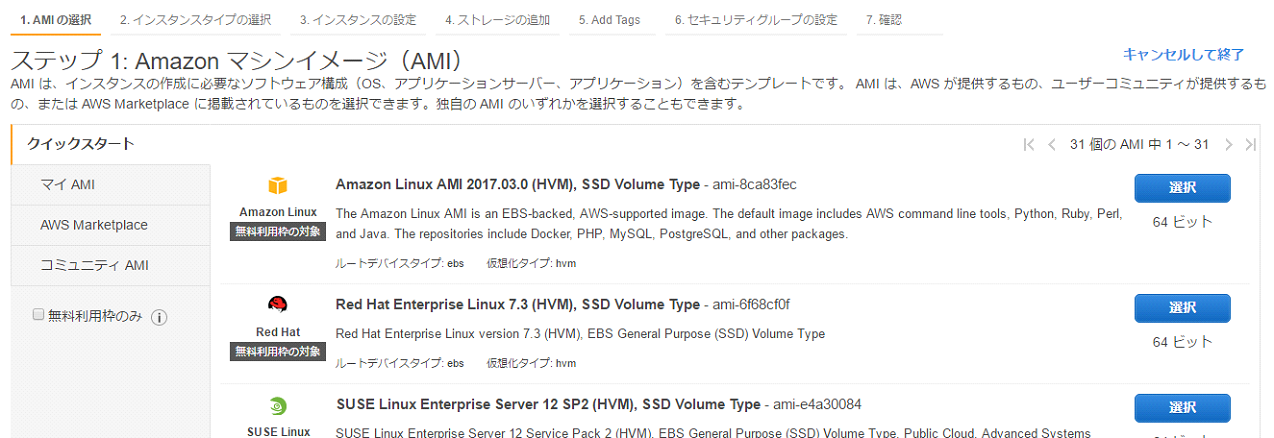
5.Amazon Linux AMIを選択
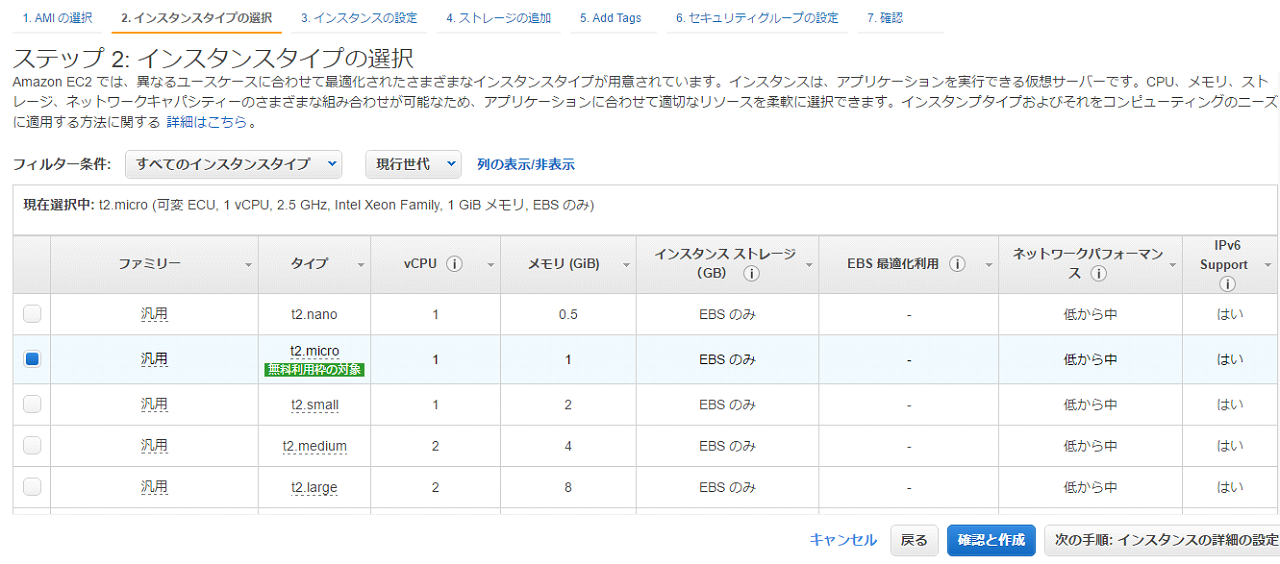
6.無料利用枠のt2.microを選択。
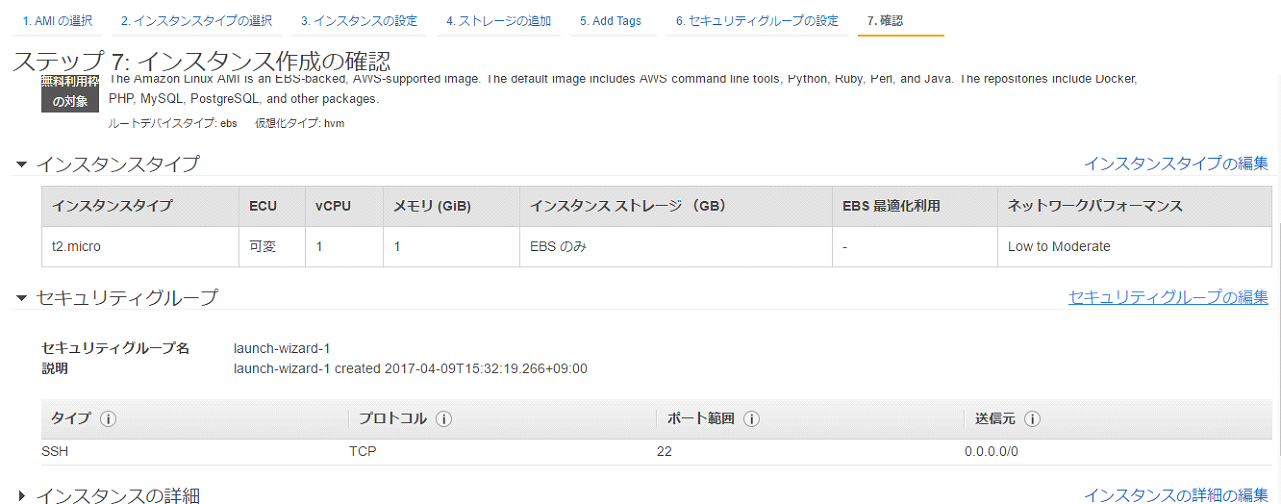
7.GitLabにアクセスできるようにセキュリティグループを編集します。
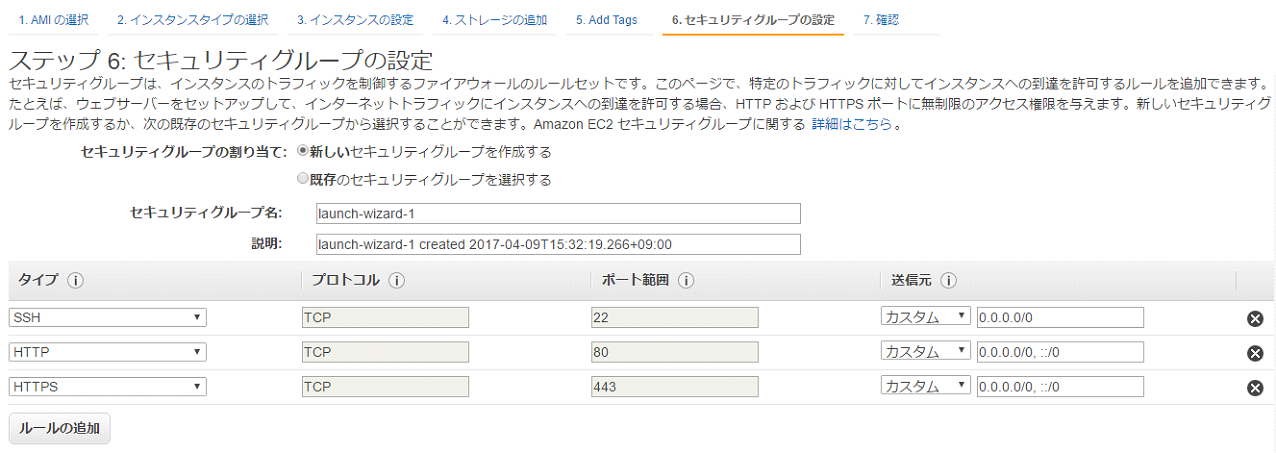
8.HTTPとHTTPSを通すように設定します。
下図では、全てのIPからアクセスを許可していますが、必要であればIP制限しましょう。
9.キーペアを作成します。
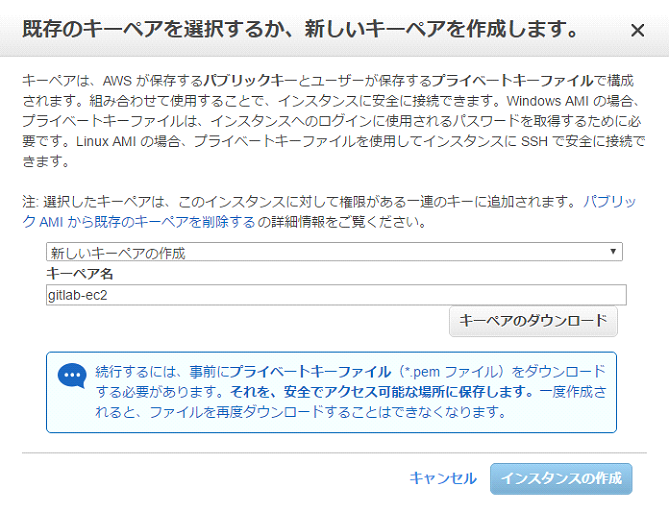
10.作成中
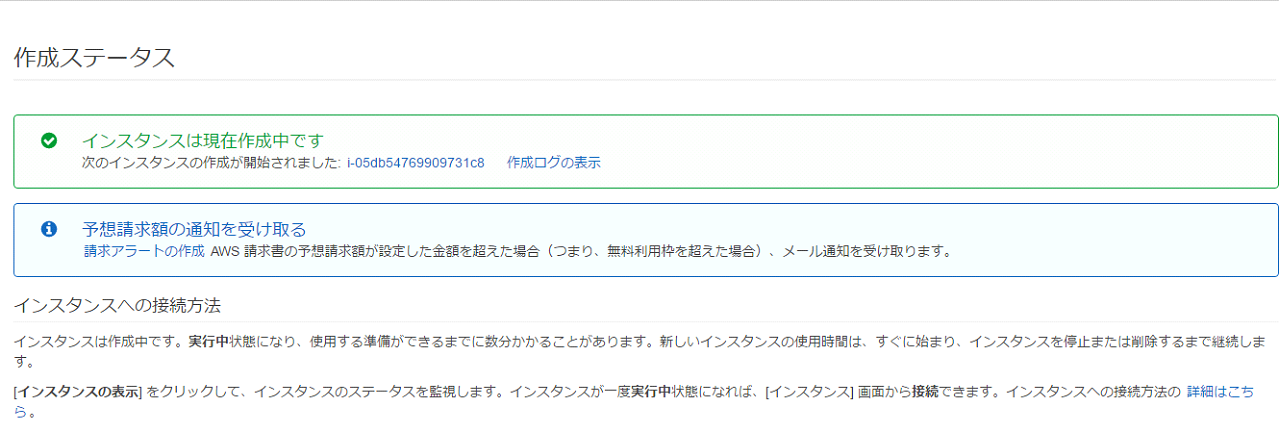
11.起動中

12.起動完了です。

13.接続確認をするためにRLoginの設定をします。
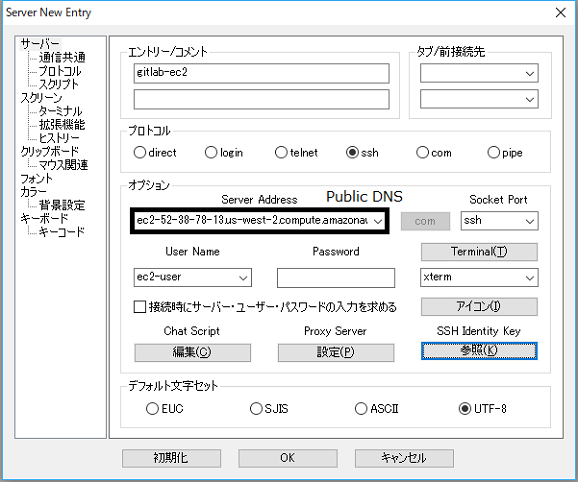
また、SSH Identity Keyの参照を押し、先程ダウンロードしたキーペアを設定します。
14.ログインをしてみます。
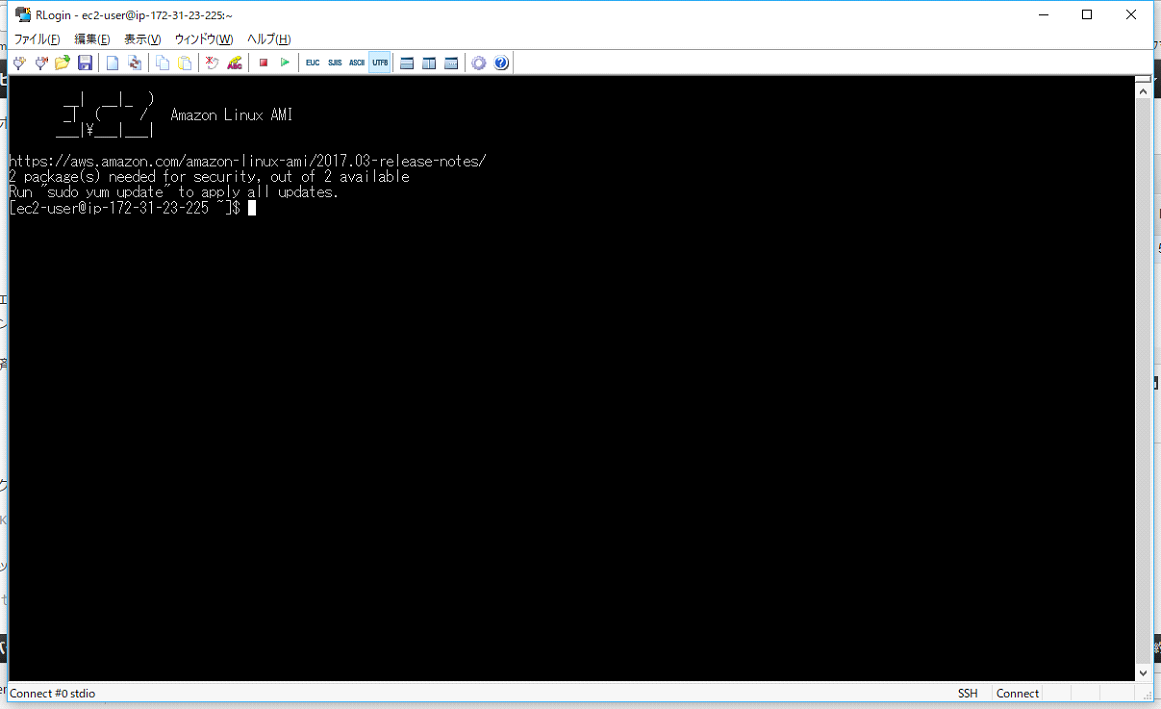 ログインできていれば、インスタンス作成は完了です。
GitLab-CEのインストール
1.まずは、rootユーザになりましょう。
2.下記URLを参考に、GitLabを入れていきます。
https://about.gitlab.com/downloads/#centos6
1
| [ec2-user] yum install curl openssh-server openssh-clients postfix cronie
|
必要なパッケージをインストールします。
3.postfix サービスの起動
1
| [ec2-user] service postfix start
|
4.postfixを自動起動するように設定
1
| [ec2-user] chkconfig postfix on
|
5.Gitlab CE本体の最新バージョンをインストール
1
2
| [ec2-user] curl -sS https://packages.gitlab.com/install/repositories/gitlab/gitlab-ce/script.rpm.sh | sudo bash
[ec2-user] yum install gitlab-ce
|
6.swap領域の作成
502エラーになる場合
Gitlabを動かす要件として、メモリ1GB以上必要
(1GBでは動かないかもしれないので、2GB swap領域を作成)
 1
 2
 3
 4
 5
 6
 7
 8
 9
10
| swapファイル作成
[ec2-user] free -m
確認
[ec2-user] dd if=/dev/zero of=/swapfile bs=1024 count=2048k
2GBメモリ作成
[ec2-user] chmod 600 /swapfile
書き込み権限付与
[ec2-user] mkswap /swapfile
スワップ領域作成
[ec2-user] swapon /swapfile
|
7.Gitlabの初期設定 + 起動
1
| [ec2-user] gitlab-ctl reconfigure
|
リバースプロキシなど設定する場合
/etc/gitlab/gitlab.rbを編集する
※リバースプロキシを設定する場合
1
2
3
4
5
| external_url 'http://git.xxxxx.com' # urlの設定。今回はhttp
gitlab_rails['time_zone'] = 'Asia/Tokyo'
nginx['listen_addresses'] = ["0.0.0.0", "[::]"]
nginx['listen_port'] = 4080 # nginxをポート4080で受けるように設定
|
設定が完了したら再起動する。
1
| [ec2-user] gitlab-ctl reconfigure
|
BASIC認証をつける場合
/etc/gitlab/gitlab.rb
※BASIC認証付ける場合
下を追加する
1
| nginx['custom_gitlab_server_config'] = "auth_basic 'Restricted';\n auth_basic_user_file '/usr/share/nginx/html/.htpasswd';\n"
|
設定を有効化
1
| [ec2-user] gitlab-ctl reconfigure
|
8.日本語化を行う
8.1 Gitlabのバージョン確認
 1
 2
 3
 4
 5
 6
 7
 8
 9
10
11
12
13
14
15
16
17
18
19
20
21
22
23
24
25
26
27
28
29
30
31
32
| gitlab-rake gitlab:env:info
info
System information
System:
Current User: git
Using RVM: no
Ruby Version: 2.3.3p222
Gem Version: 2.6.6
Bundler Version:1.13.7
Rake Version: 10.5.0
Redis Version: 3.2.5
Git Version: 2.10.2
Sidekiq Version:4.2.7
GitLab information
Version: 9.0.4
Revision: 63e052a
Directory: /opt/gitlab/embedded/service/gitlab-rails
DB Adapter: postgresql
URL: http://ec2-52-38-78-13.us-west-2.compute.amazonaws.com
HTTP Clone URL: http://ec2-52-38-78-13.us-west-2.compute.amazonaws.com/some-group/some-project.git
SSH Clone URL: [email protected]:some-group/some-project.git
Using LDAP: no
Using Omniauth: no
GitLab Shell
Version: 5.0.0
Repository storage paths:
- default: /var/opt/gitlab/git-data/repositories
Hooks: /opt/gitlab/embedded/service/gitlab-shell/hooks/
Git: /opt/gitlab/embedded/bin/git
|
8.2 バージョン確認後、下記URLにアクセス
https://github.com/ksoichiro/gitlab-i18n-patch
8.3 バージョンに沿ったパッチをインストールする
1
2
3
4
5
| [ec2-user] wget https://raw.githubusercontent.com/ksoichiro/gitlab-i18n-patch/master/patches/v9.0.4/app_ja.patch
[ec2-user] cd /opt/gitlab/embedded/service/gitlab-rails
[ec2-user] patch -p1 < ~/app_ja.patch
patch が入っていない場合、
[ec2-user] yum install patch -y
|
etc. Apacheと連携する際のリバースプロキシ設定
httpしか使わない場合の設定
/etc/httpd/conf.d/vhost.conf
 1
 2
 3
 4
 5
 6
 7
 8
 9
10
11
12
13
14
15
16
17
18
| <VirtualHost *:80>
DocumentRoot /var/www/html/gitlab.k-bushi.com
ServerName gitlab.k-bushi.com
AllowEncodedSlashes On
CustomLog logs/gitlab.k-bushi.com.access.log combined
ErrorLog logs/gitlab.k-bushi.com.error.log
ProxyRequests off
ProxyPass / http://127.0.0.1:4080/
ProxyPassReverse / http://127.0.0.1:4080/
ProxyPass /assets http://127.0.0.1:4080/assets
ProxyPassReverse /assets http://127.0.0.1:4080/assets
<Directory /var/www/html/gitlab.k-bushi.com>
AllowOverride All
Options FollowSymLinks
Require all granted
DirectoryIndex index.php index.html
</Directory>
</VirtualHost>
|
Gitlabアクセス

gitlab.k-bushi.comは、前回記事で書いたように、
Apacheからのリバースプロキシで、nginxにリクエストを流している。


